In this article
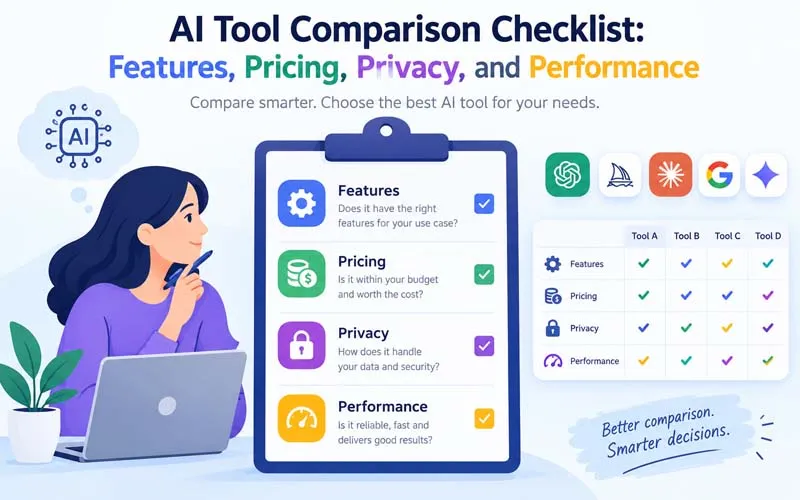
Two AI tools can look almost identical on their websites, yet feel completely different once you use them. Comparing them by gut feeling or by the loudest marketing claim usually leads to regret. A structured checklist fixes this. In this guide you will get a ready-to-use AI tool comparison checklist covering four areas that matter most: features, pricing, privacy, and performance, plus a simple scoring method to pick a winner with confidence.
Why You Need a Comparison Checklist
Without a checklist, it is easy to fall into common traps: choosing the tool with the best demo, ignoring hidden costs, or overlooking how your data is handled. A checklist forces you to judge every tool by the same rules, so the comparison stays fair and your decision is easy to explain to a team, a client, or your future self.
Before You Start: Prepare Your Test
Spend ten minutes on preparation and the rest of the process becomes much faster.
- Shortlist two to four tools. More than that makes comparison tiring and unclear.
- Choose two or three real tasks you want the tool to handle, such as drafting a report or summarising a document.
- Decide your must-haves. These are features or conditions a tool must meet, or it is out immediately.
- Set a budget range so pricing does not become a surprise later.
Part 1: Features Checklist
Features show what a tool can do. Do not count them. Check whether they match your actual work.
- Core capability: Does it do the main job well, such as writing, image creation, coding, or transcription?
- Ease of use: Can a new user get a useful result in the first session without a tutorial?
- Customisation: Can you control tone, style, format, or brand settings?
- Integrations: Does it connect with the apps and platforms you already use?
- Import and export: Can you bring in your files and take your work out in useful formats?
- Collaboration: Are there shared workspaces, comments, or user roles?
- Language support: Does it handle the languages your audience or team needs?
- Mobile and platform access: Is it available on the devices you actually use?
- Support and learning resources: Are there guides, tutorials, and responsive help?
Part 2: Pricing Checklist
The price on the homepage rarely tells the full story. Look closely at how you will actually be charged.
- Free plan limits: What exactly is restricted, such as usage caps, features, or export quality?
- Pricing model: Is it per user, per usage, per credit, or a flat fee?
- Usage limits: What happens when you reach the cap? Do you wait, upgrade, or pay extra?
- Add-on costs: Are advanced features, extra seats, or premium support charged separately?
- Billing flexibility: Is monthly billing available, or are you pushed to a yearly commitment?
- Trial and refund policy: Can you test before paying and cancel without friction?
- Cost against time saved: Estimate how many hours the tool saves and what that time is worth.
Tip: Pricing changes often in this industry, so always confirm on the official pricing page on the day you decide.
Part 3: Privacy and Security Checklist
This is the part many people skip, and it can matter most, especially when you handle client or business data.
- Data use for training: Are your inputs used to improve the provider's models, and can you opt out?
- Data retention: How long are your files and conversations stored, and can you delete them?
- Data location and handling: Does the provider explain where and how data is stored?
- Security controls: Look for options such as two-factor authentication and access management.
- Business and team plans: Do they offer stronger privacy commitments than personal plans?
- Compliance information: Does the company publish clear information about the standards and regulations it follows?
- Transparency: Are the terms of service and privacy policy easy to find and written in plain language?
- Ownership of output: Are you clear on who owns and can commercially use what the tool produces?
Part 4: Performance Checklist
Performance is what you only learn by testing. Run the same tasks in every tool and compare the results side by side.
- Output quality: Is the result accurate, clear, and close to what you wanted on the first try?
- Accuracy: Check facts, calculations, and references yourself. Note any confident mistakes.
- Consistency: Repeat the same task a few times. Are results reliably good, or do they vary wildly?
- Speed: How quickly does it respond or finish a task?
- Handling of complex tasks: Does it manage long documents, multi-step requests, or detailed instructions?
- Editing effort: How much cleanup does the output need before it is ready to use?
- Reliability: Does the service stay available and stable during your tests?
How to Score and Compare Tools
Once you have gathered your notes, turn them into a simple score so the winner is clear.
- Assign weights. Decide how important each area is to you. For example: Performance 40%, Privacy 25%, Features 20%, Pricing 15%.
- Score each area from 1 to 5 for every tool, based on your checklist notes.
- Multiply and add. Multiply each score by its weight and add the totals.
- Check your must-haves. Any tool that fails a must-have is eliminated, no matter its score.
Sample Comparison Table
| Area | Weight | Tool A (1-5) | Tool B (1-5) | Tool C (1-5) |
|---|---|---|---|---|
| Features | 20% | |||
| Pricing | 15% | |||
| Privacy | 25% | |||
| Performance | 40% | |||
| Weighted total | 100% |
Adjust the weights to your situation. A freelancer may weigh pricing more, while a company handling client data should weigh privacy higher.
Red Flags to Watch For
- No clear privacy policy or terms of service
- Vague pricing, hidden fees, or difficulty cancelling
- Claims that sound too perfect, such as "100% accurate" or "replaces your whole team"
- No way to export or delete your data
- Poor or missing customer support
- Reviews that all sound alike or read like advertising
Common Comparison Mistakes
- Comparing on different tasks: Use the same inputs for every tool or the results are not comparable.
- Judging by a single test: Run each task more than once to see consistency.
- Focusing only on price: The cheapest tool can cost more if it needs constant fixing.
- Ignoring your team: Include the people who will use the tool daily in the trial.
- Never revisiting the decision: Review your choice every few months as tools improve.
Final Thoughts
A good AI tool comparison is simple: prepare real tasks, check features, pricing, privacy, and performance with the same checklist, then score the results. This takes an afternoon rather than weeks, and it protects you from wasted subscriptions and data risks. Save this checklist, reuse it each time a new tool appears, and you will always choose with confidence rather than hype.
Frequently asked questions
How many AI tools should I compare at once?
Two to four is ideal. It gives enough variety to see differences without making the process overwhelming.
Which factor matters most: features, pricing, privacy, or performance?
It depends on your situation. Performance on your real tasks usually matters most, but privacy becomes the top priority when you handle sensitive or client data.
Is a free trial enough to judge an AI tool?
Often yes, if you test it on real work. Make sure the trial includes the features you plan to use, since some limit advanced options.
How often should I re-evaluate my AI tools?
A review every three to six months is a good habit, since features, pricing, and policies change quickly.
Get posts in your inbox
One email a week — new guides, comparisons and the AI tool news actually worth reading.
✓ You're subscribed — check your inbox to confirm.